Step 3a. Verify AUX Channels
What You Need:
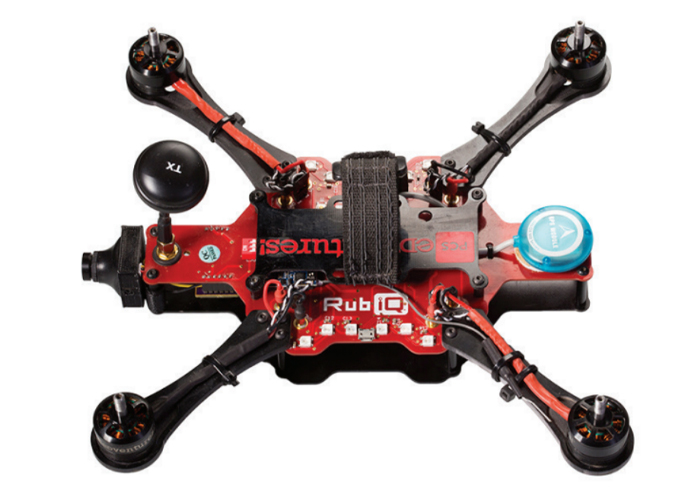
RubiQ 1.0 or 1.5
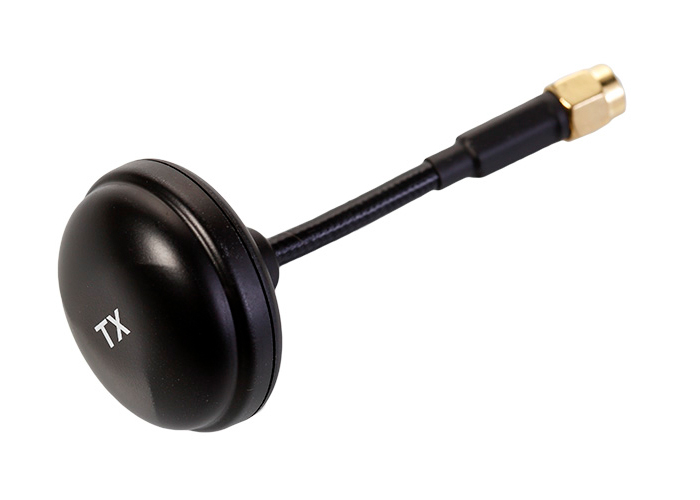
Antenna
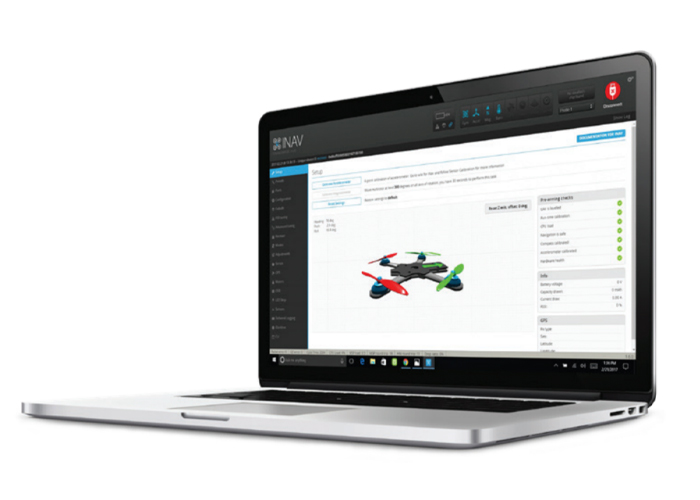
INAV 1.6.2
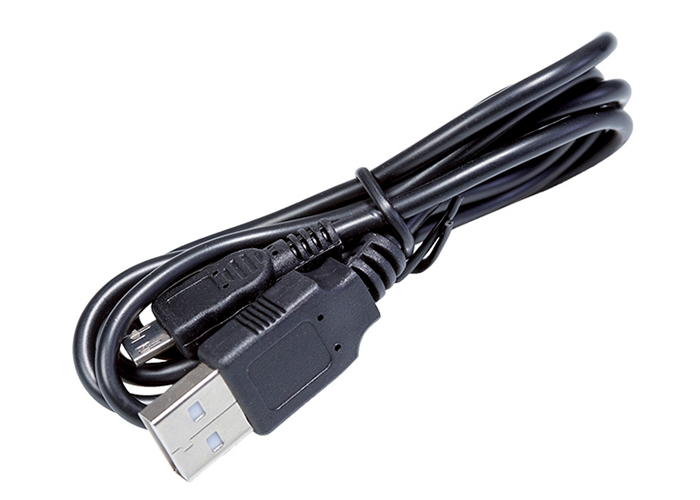
Micro USB
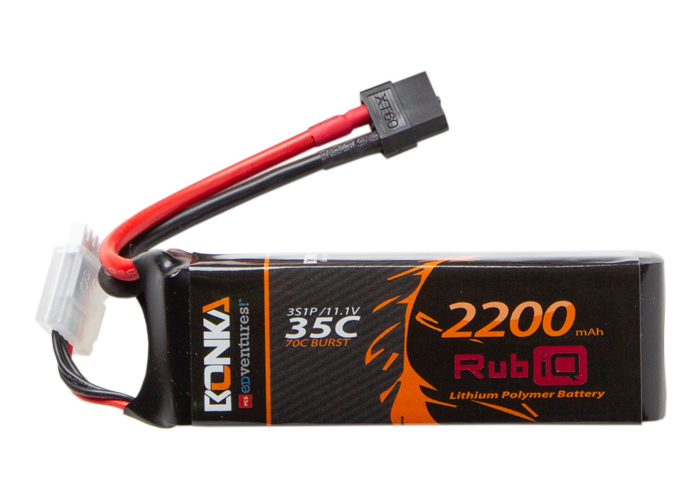
LiPo Battery
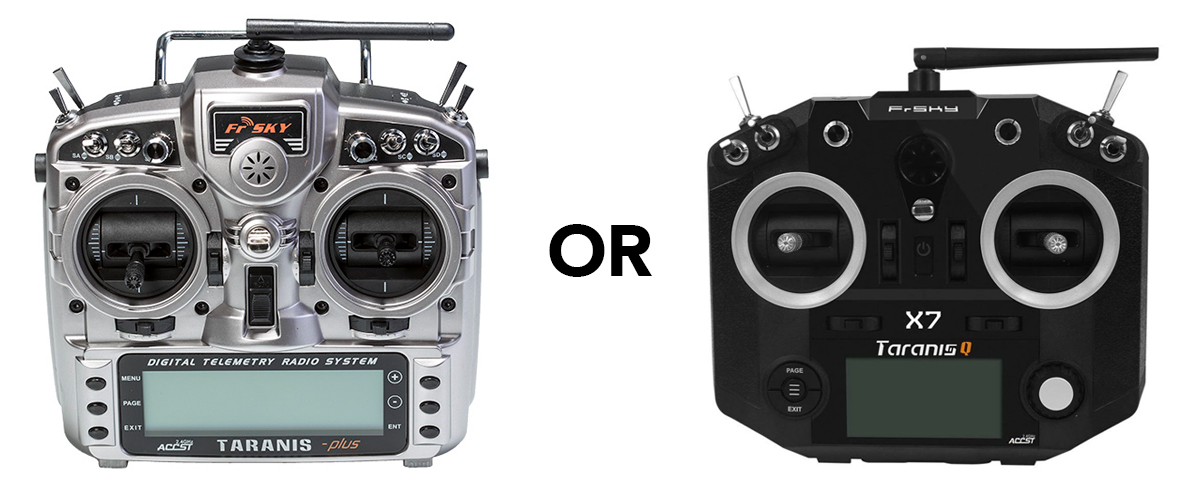
Taranis X9D or Taranis QX7
Steps:
WARNING! Remove props and attach the antenna before verifying channel mapping.
In a flight simulator, a pilot only needs two joysticks to control the on-screen drone — everything else is already taken care of by the virtual flight program. In real life, a number of other switches are needed to actually fly your drone. You’ll need these to set the flight mode, activate safety features and arm or disarm the drone — incredibly important features of safe piloting, both for spectators and RubiQ herself. These switches on the radio controller are configured in INAV.
The recommended switch inputs and functions for RubiQ are:
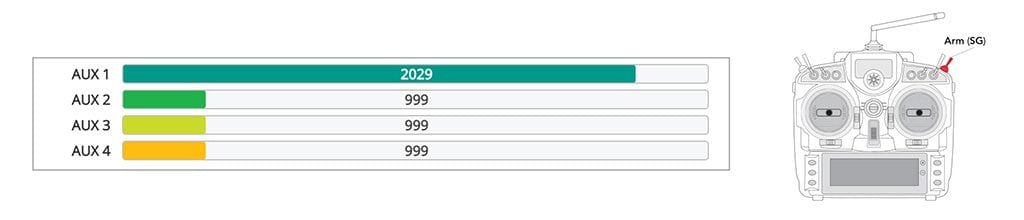
- Channel 5: SG (Arm/Disarm)
- Channel 6: SE (Flight Mode)
- Channel 7: SA (Position Hold and Return to Home)
- Channel 8: SF (Beeper)
Note: Radios purchased directly from PCS come with RubiQ’s inputs pre-configured as outlined above. If your radio has been purchased elsewhere or tinkered with extensively, visit rubiq.edventures.com/file-downloads/ to flash a RubiQ Radio Configuration file directly to the Taranis or consult your radio’s user guide for manual set-up instructions.
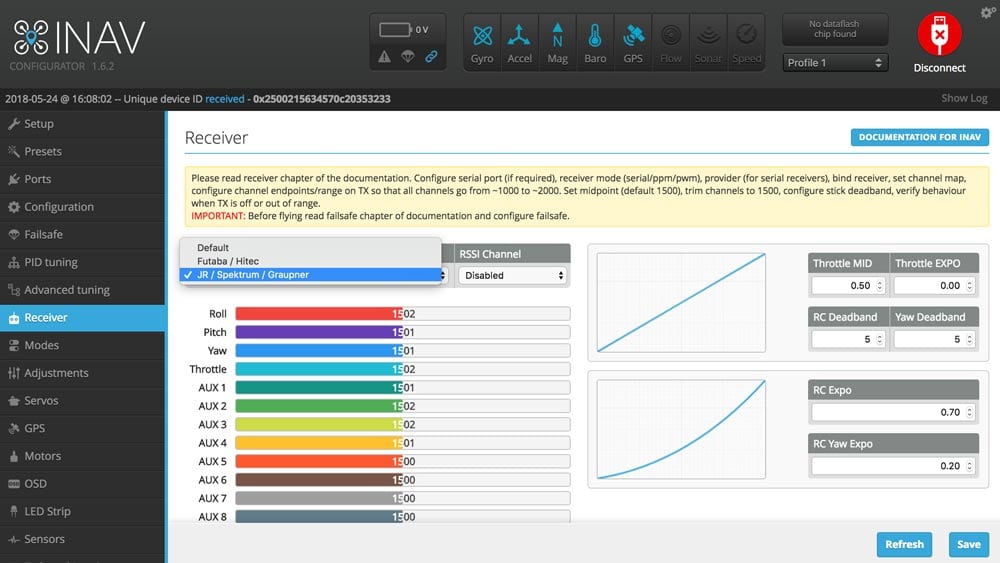
- To check the AUX channel mapping, reconnect the USB cable and open the Receiver tab in INAV.

- Move each of the four AUX switches on the radio and watch to see that the corresponding bar moves on the Channel Map.
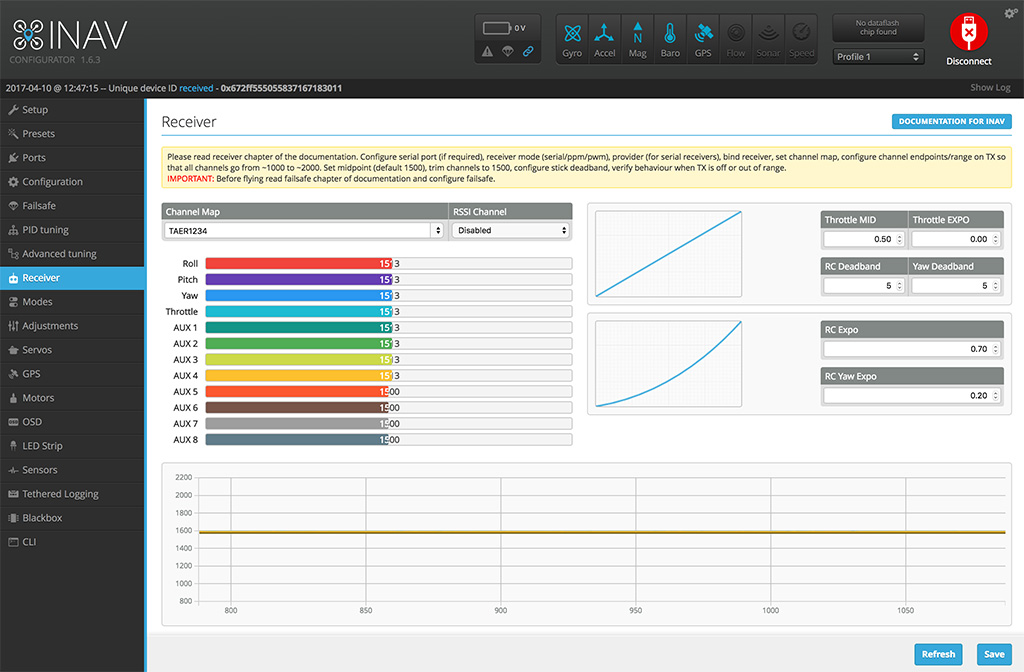
The SG switch on the radio should control the AUX 1 bar in INAV. This will Arm and Disarm the drone.
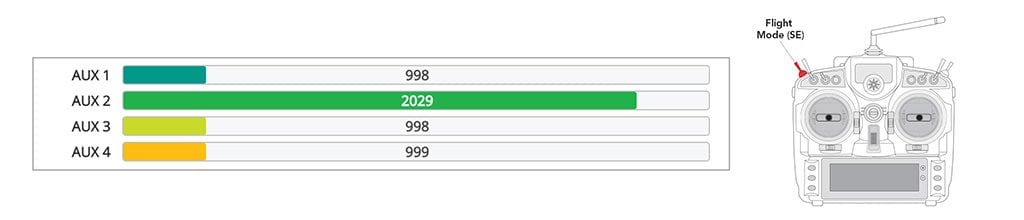
The SE switch on the radio should control the AUX 2 bar in INAV. This will set the Flight Mode.
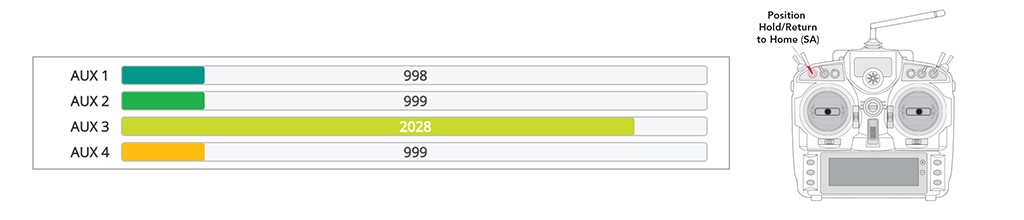
SA controls AUX 3. This will activate Position Hold and Return to Home.
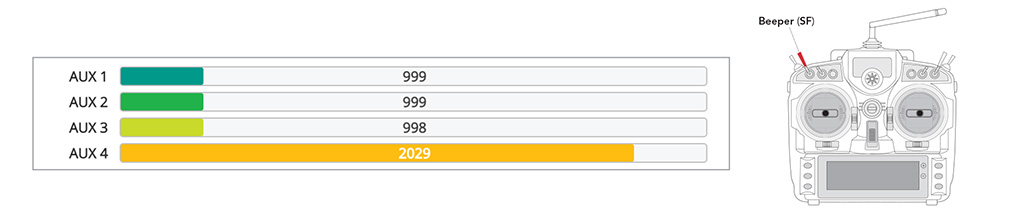
SF controls AUX 4. This will be the Beeper.
Troubleshooting:
If the channels aren’t mapped correctly (for example, AUX 1 moves when you flip the SF switch), switch the Channel Map to TAER1234, save and test the sticks again. If the channels still don’t line up, the radio may need to be reflashed to the original settings or manually reprogrammed.
In a flight simulator, a pilot only needs two joysticks to control the on-screen drone — everything else is already taken care of by the virtual flight program. In real life, a number of other switches are needed to actually fly your drone. You’ll need these to set the flight mode, activate safety features and arm or disarm the drone — incredibly important features of safe piloting, both for spectators and RubiQ herself. These switches on the radio controller are configured in INAV.
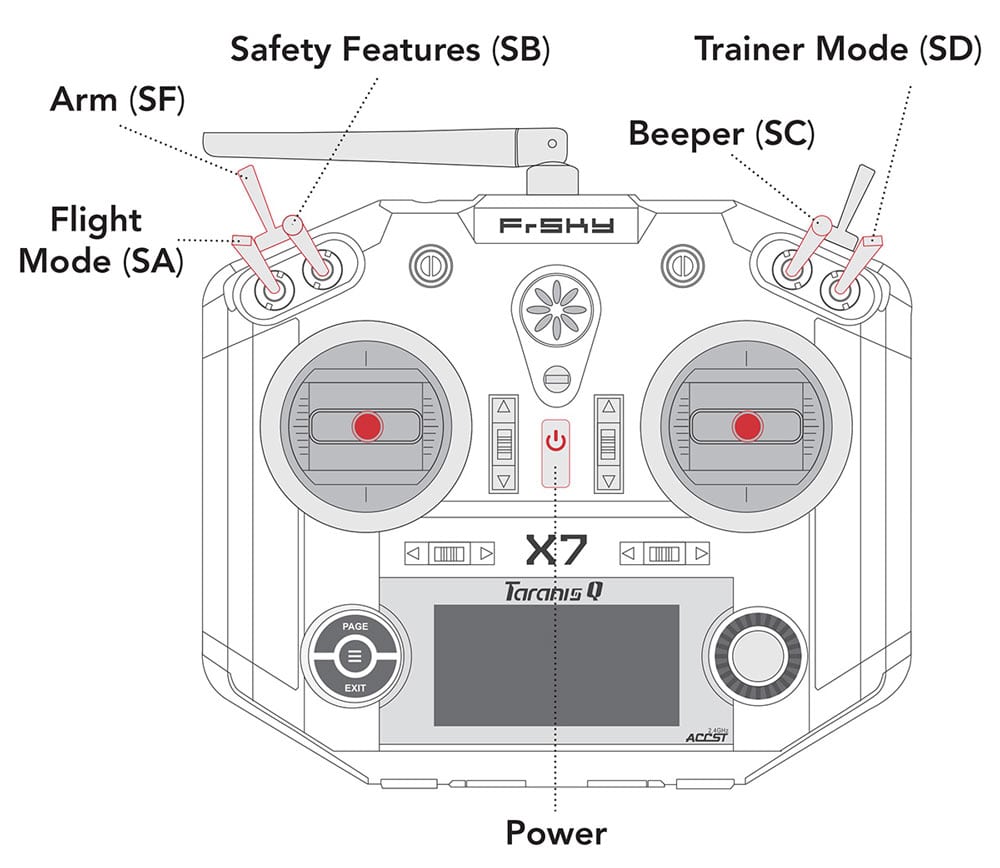
The recommended switch inputs and functions for the Q X7 radio controller are:
- AUX 1/Channel 5: SF (Arm/Disarm)
- AUX 2/Channel 6: SA (Flight Mode)
- AUX 3/Channel 7: SB (Position Hold and Return to Home)
- AUX 4/Channel 8: SC (Beeper)
Note: Radios purchased directly from PCS come with RubiQ’s inputs pre-configured as outlined above. If your radio has been purchased elsewhere or tinkered with extensively, visit rubiq.edventures.com/downloads/ to flash a RubiQ Radio Configuration file directly to the Taranis or consult your radio’s user guide for manual set-up instructions.
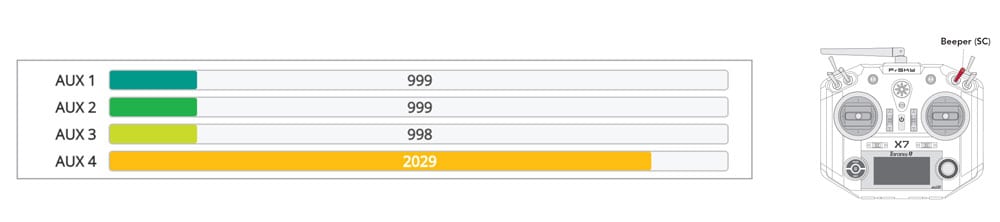
- To check the AUX channel mapping, reconnect the USB cable and open the Receiver tab in INAV.
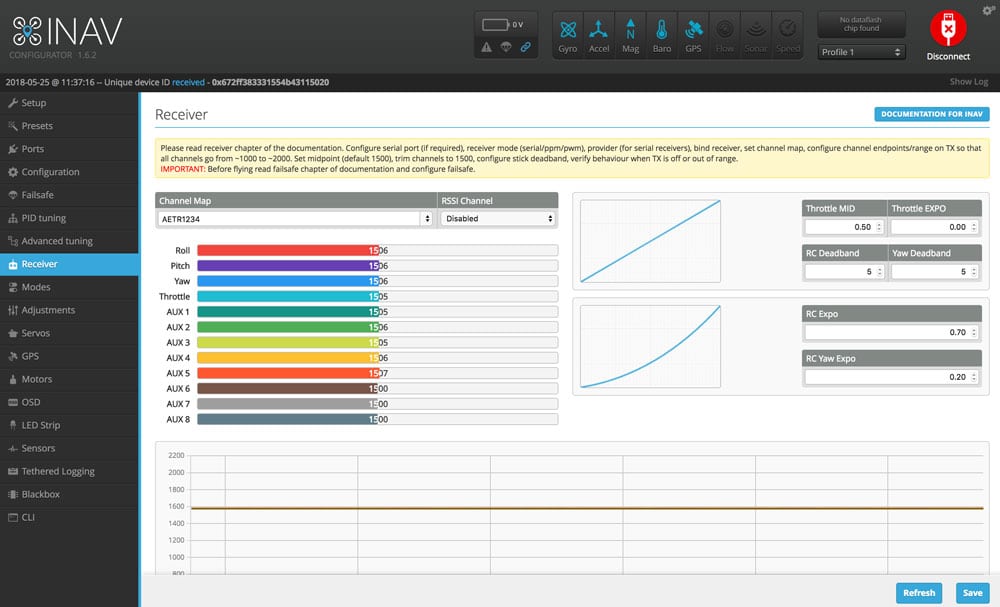
Move each of the four AUX switches on the radio and watch to see that the corresponding bar moves on the Channel Map.
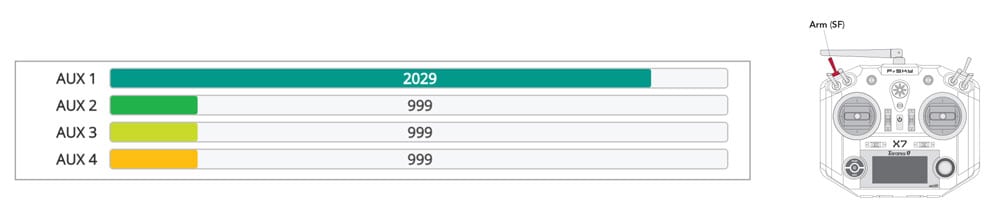
On the Taranis Q X7 radio controller, the SF switch on the radio should control the AUX 1 bar in INAV. This will Arm and Disarm the drone.
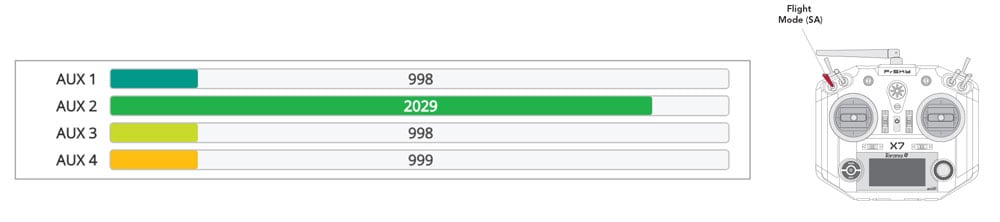
On the Taranis Q X7 radio controller, the SA switch on the radio should control the AUX 2 bar in INAV. This will set the Flight Mode.
On the Taranis Q X7 radio controller, SB controls AUX 3. This will activate Position Hold and Return to Home.
 On the Taranis Q X7 radio controller, SC controls AUX 4. This will be the Beeper.
Troubleshooting:
If the channels aren’t mapped correctly, the radio may need to be reflashed to the original settings or manually reprogrammed. Visit rubiq.edventures.com/file-downloads/ to flash a RubiQ Radio Configuration file directly to the Taranis or consult your radio’s user guide for manual set-up instructions.